
 Sign in
 Sign up

Wireless Communication System – Drone Systems Explained 5
Drone Wireless Communication System
The Wireless Communication System is the invisible bridge between your drone and remote controller.It carries pilot commands up to the drone, and sends live video plus flight status data back down to your screen.
In a typical consumer drone, this system is built from three coordinated data links: the Remote Control Link, FPV Video Link, and Telemetry Link. Each link operates on specific frequency bands and channels, using dedicated antennas to ensure stable, responsive, and safe communication.
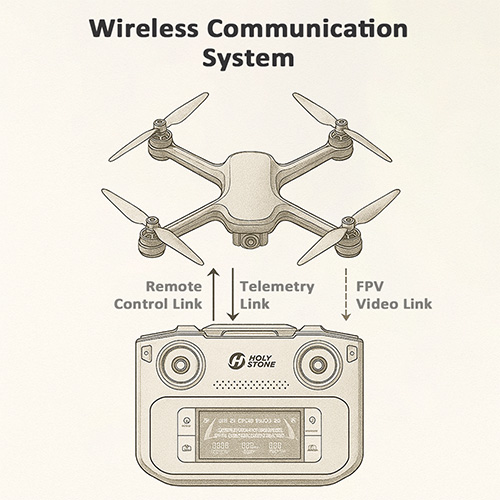
Stick and button commands sent from the controller up to the drone.
Live camera view streaming down to your phone or remote screen.
Status data like battery, GPS, and mode coming back from the drone.
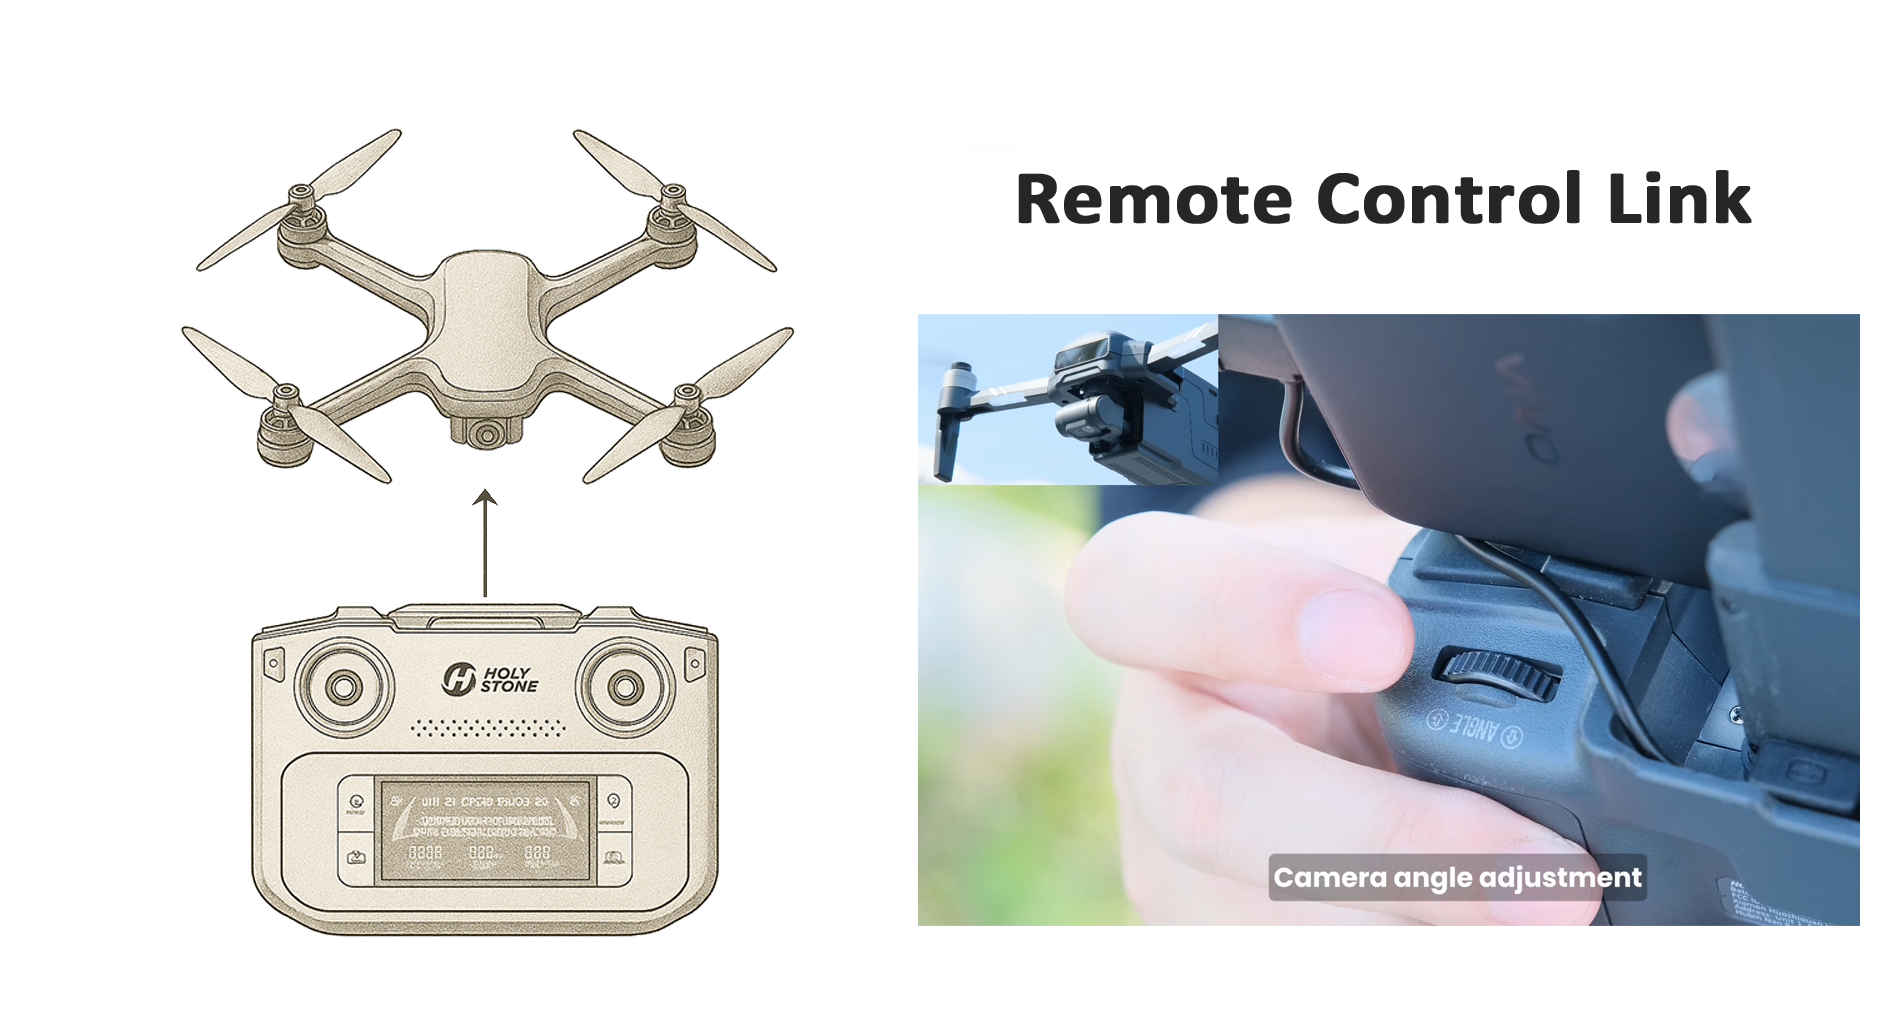
Link 1Remote Control Link – Command Channel ↑ Back
What – What is the Remote Control Link?
Remote Control Link = The wireless control system that allows the drone to “understand” pilot commands
The Remote Control Link is the communication system that converts your joystick and button inputs into wireless control signals and sends them to the drone, allowing it to perform flight actions.
It performs three key functions:
① Binding (Pairing)
Before first use, the drone and the remote must be paired to confirm identity and avoid signal confusion or controlling the wrong drone.② Sending flight commands
Your stick movement and button actions are transmitted through 2.4GHz / 5GHz frequency bands to drive the drone to take off, move, hover, turn, or land.③ Returning status information
The drone sends basic status back to the controller or app, such as signal strength, weak signal warnings, and link-loss alerts.
How pilot commands are mapped – Control Modes (Mode 1 & Mode 2)
The Remote Control Link does not just transmit signals — it also follows a control mapping logic. This mapping defines which joystick controls which flight axis, and it is commonly referred to as the control mode.
The two most widely used mappings are Mode 2 and Mode 1. Both modes send the same wireless commands through the Remote Control Link — the difference lies in how pilot inputs are interpreted and assigned.
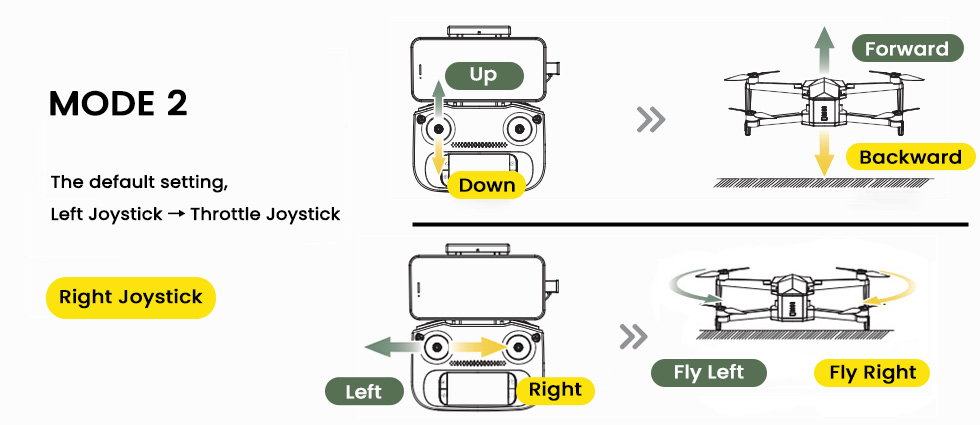
Mode 2 (Default on most consumer drones):
Left joystick: Throttle (ascend / descend) + yaw (rotation)
Right joystick: Forward / backward + left / right movement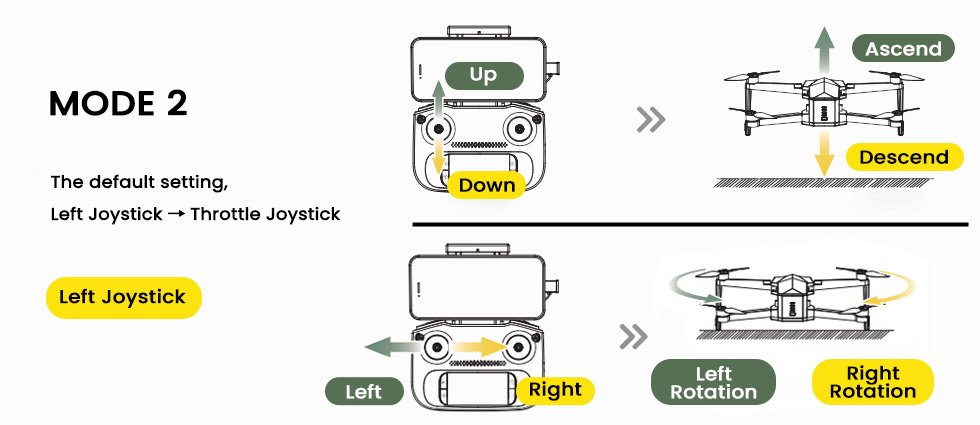
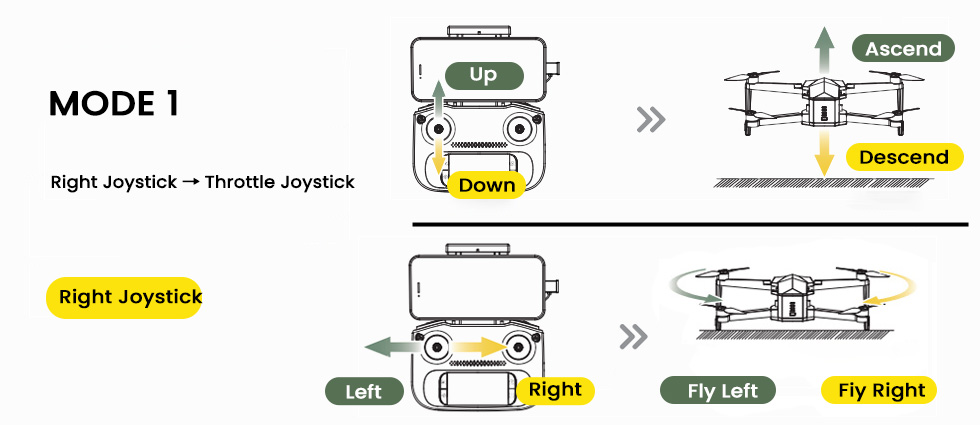
Mode 1:
Right joystick: Throttle (ascend / descend)
Left joystick: Forward / backward movement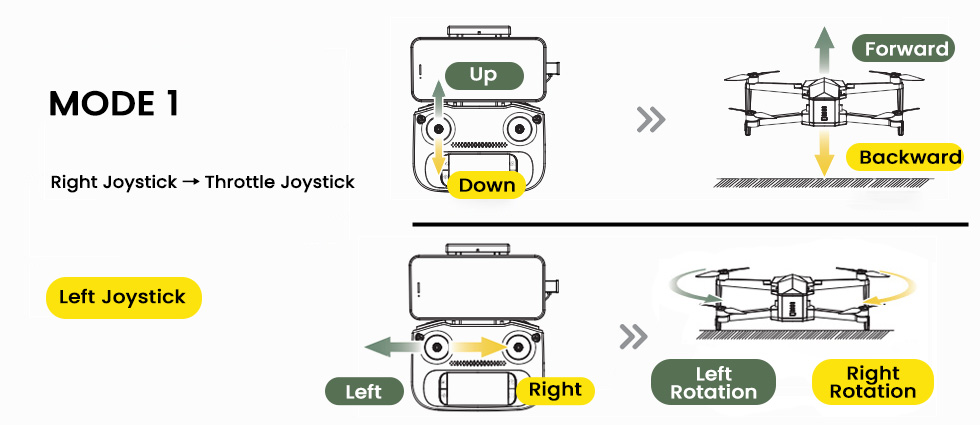
In simple terms: Changing control mode does not change the wireless link itself. It changes how the Remote Control Link translates human intent into flight commands.
⚠ Note: Live camera video belongs to the “FPV Video Link,” not the Remote Control Link, even if they sometimes use the same radio band.
In one sentence: Without the Remote Control Link, the drone cannot be controlled. A stronger link means safer and more stable flight.
2.4GHz vs 5GHz Frequency Comparison
| Band | Main Features | Recommended Environment | Usage Tips |
|---|---|---|---|
| 2.4GHz | Stronger penetration and longer control range. | Open outdoor fields with low interference. | Choose it for long-range flights, but keep the drone within visual line of sight. |
| 5GHz | Cleaner band, lower interference, smoother response. | Cities and parks with many Wi-Fi signals. | Great for short-to-medium flights; watch for weak signal alerts. |
Why – Why does the control link weaken in real flight?
Real flight environments are far more complex than laboratory testing. The following factors cause real-world range to be shorter than manual specifications: Tip: Even with a strong control link, unfamiliar control mode mapping can cause delayed reactions or over-correction, which may feel like poor control.
Physical obstruction: Trees, buildings, and metal objects absorb radio signals.
Radio interference: Wi-Fi, Bluetooth, hotspots, or cellular towers pollute radio channels.
Body blocking: The human body contains water and absorbs signal energy.
Antenna angle errors: Pointing antennas directly at the drone gives the weakest signal; the side surface gives the strongest radiation.
Low battery power: Low remote battery reduces output power and weakens transmission strength.
Specification numbers are based on ideal open testing ranges; normal field conditions are never identical.
How – How to keep the Remote Control Link strong and stable?
These simple flying habits can significantly improve link stability and safety:
Control mode tip: Choose and stay consistent with one control mode, especially during early learning. Muscle memory plays a critical role in how effectively pilot commands translate into flight actions.
Correct antenna positioning:Keep antennas vertical and let the antenna sides face the drone.
——Reason: Antennas radiate strongest from the side surface, not the tip.Maintain visual line of sight:Avoid flying behind buildings, hills, or deep into forests.
——Reason: Obstacles absorb radio waves and cause signal drops.Select the right frequency:2.4GHz outdoors; 5GHz in Wi-Fi-dense cities.
——Reason: Band characteristics vary by environment.Avoid interference areas:Stay away from power lines, routers, and industrial RF sources.
——Reason: RF noise disrupts link quality.Keep remote battery high:Ensure the controller has enough power before flight.
——Reason: Transmission power depends on battery level.Do not let the drone fly behind you:
——Reason: The human body blocks and absorbs RF energy.
Extra – Frequently Asked Questions
Q1: Why is real control distance shorter than specifications?
Specifications are measured in interference-free open fields; real-world environments are different.
Q2: What happens if the Remote Control Link drops?
The drone triggers fail-safe protection and attempts to Return-to-Home.
Q3: What is the difference between RC Link and FPV Video Link?
RC Link controls the drone’s movement; FPV Link transmits the camera video signal.
Link 2FPV Video Link – Live View ↑ Back
What – What is the FPV Video Link?
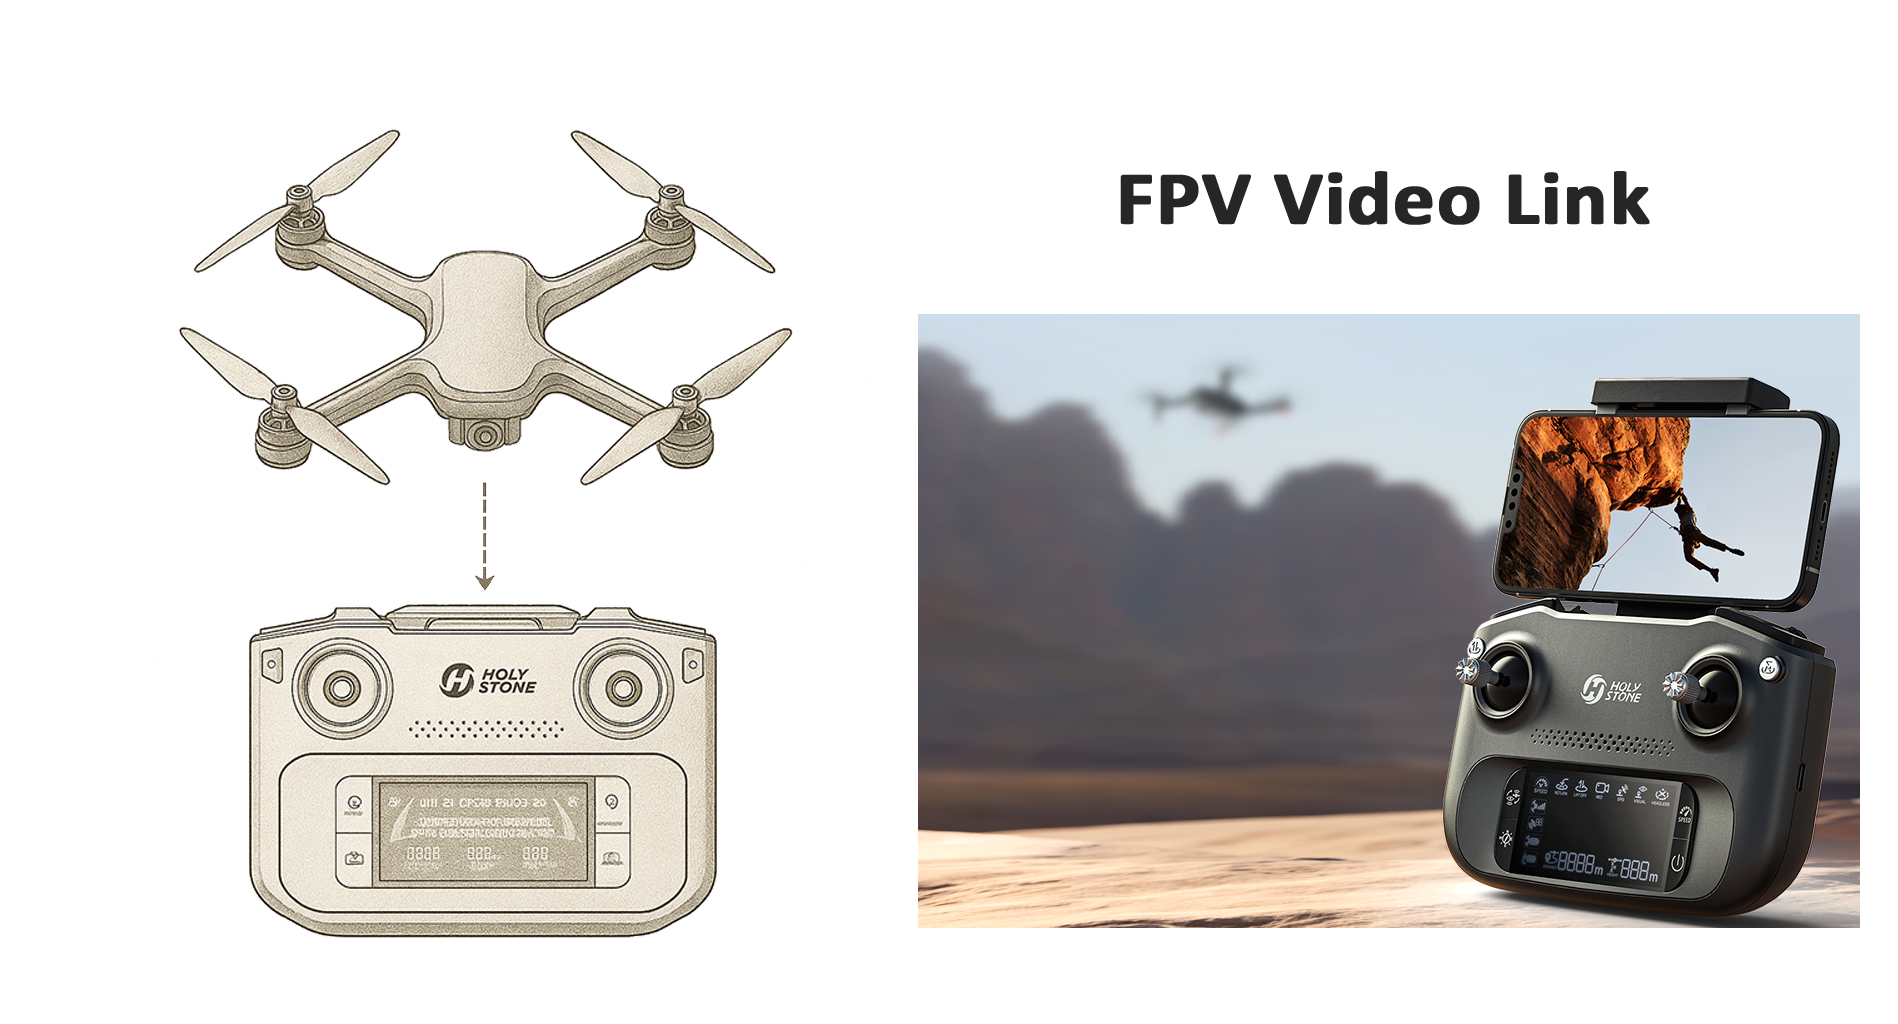
FPV Video Link = The live “eyes” of your drone
The FPV (First-Person View) Video Link is the wireless channel that sends a live video stream from the drone’s camera to your phone or remote controller screen. It lets you see what the drone sees in real time so you can frame shots, avoid obstacles, and navigate more confidently.
Why – Why do latency and stability matter so much for FPV?
A good FPV link makes flying feel natural and controlled:
Low latency means the image on your screen closely matches the drone’s real position and angle.
Stable signal avoids frozen frames, heavy blocky artifacts, or sudden blackouts.
Consistent quality helps you judge distance and composition and create smooth, cinematic shots.
If latency is high or the video keeps breaking up, pilots tend to over-correct or hesitate, which can lead to poor footage or risky flying.
How – How does the FPV stream travel from the camera to your screen?
The camera sensor sends raw frames to the image processor, which compresses them into a video stream (for example using H.264 or H.265). The FPV module breaks that stream into packets, applies error correction, and modulates it onto a radio signal on the supported band (for example 2.4GHz or 5GHz).
On the ground, the receiver grabs these radio signals, demodulates them, checks for errors, and feeds the video packets into a decoder. Your phone or remote controller then rebuilds the frames and displays them as smooth live video.
Extra – Tips for clearer FPV video
Keep the drone and controller antennas unobstructed and avoid flying directly behind buildings or thick trees.
In noisy city areas, staying a bit closer and higher often gives a cleaner FPV link.
Make sure your phone or tablet performance is sufficient so decoding and display do not add extra lag.
Link 3Telemetry Link – Status & Fail-safe Data ↑ Back
What – What is the Telemetry & Status Link?
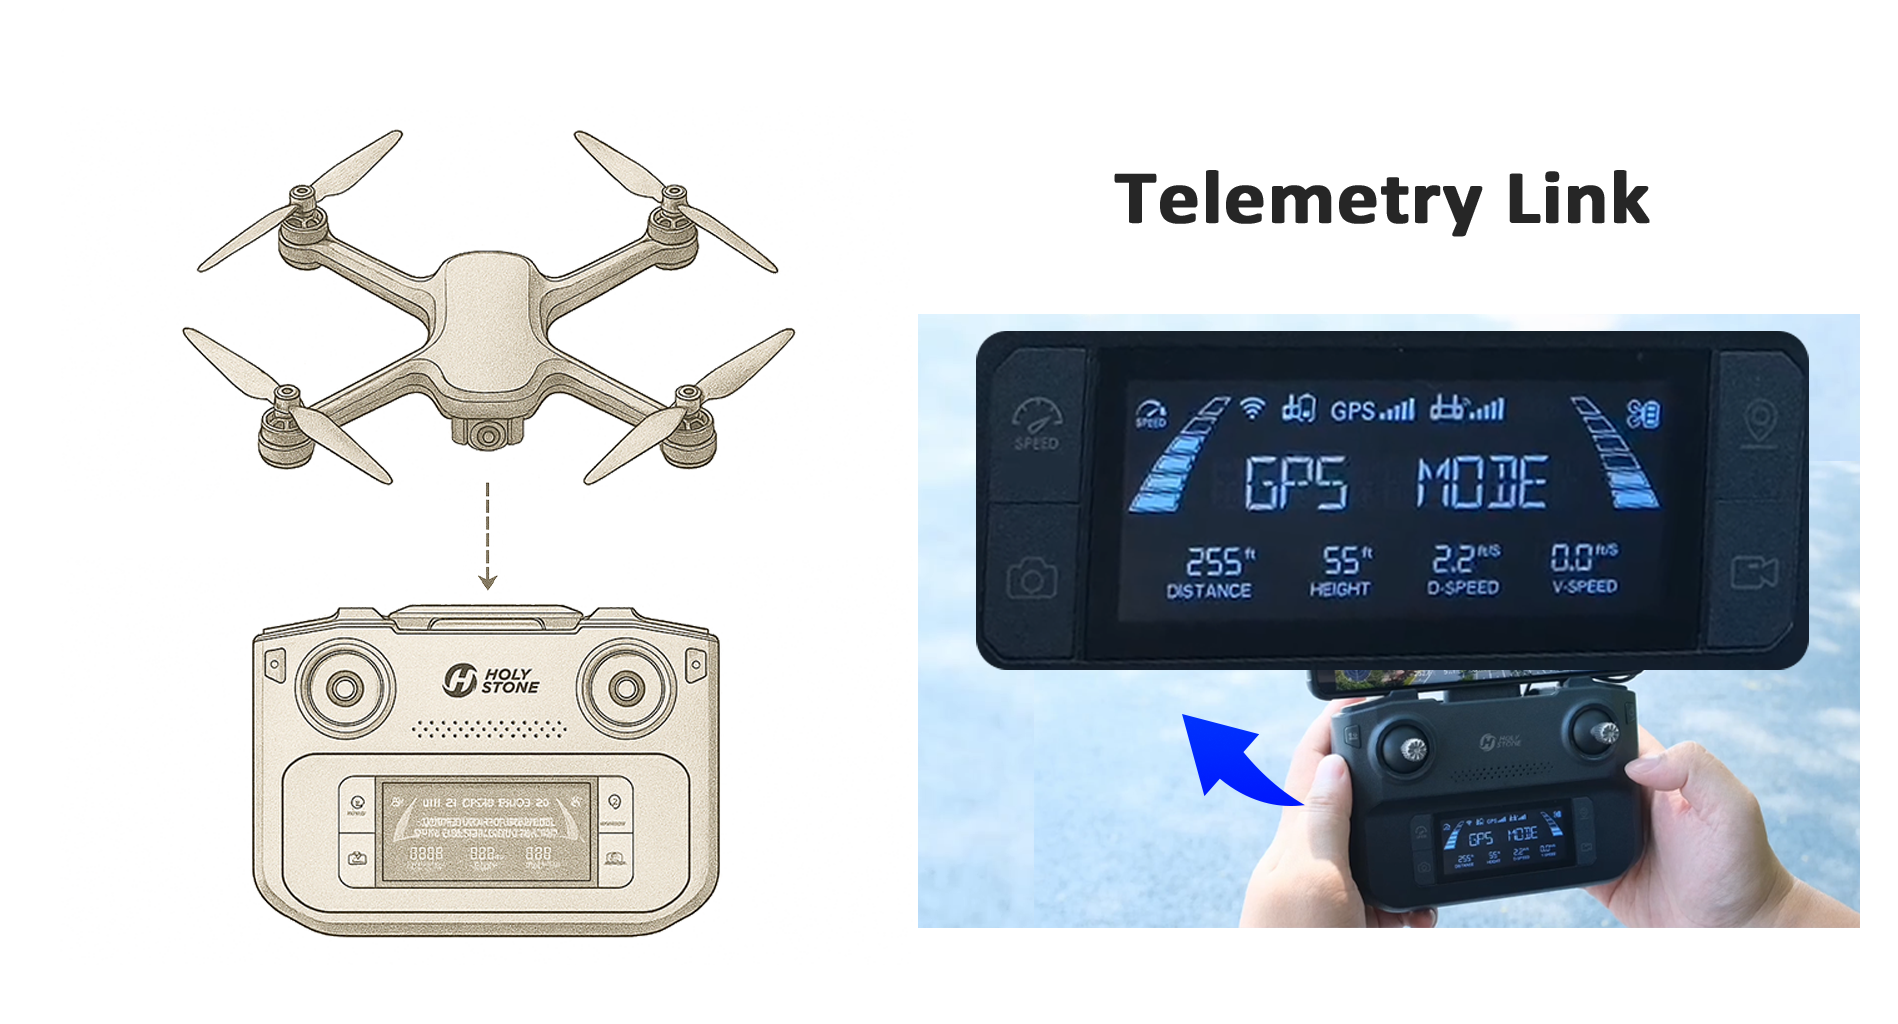
Telemetry Link = The “health report” coming back from the drone
The Telemetry & Status Link carries live data from the drone back to the pilot. It includes information such as GPS position, flight mode, battery level, signal strength, and sometimes even motor or sensor warnings. The data volume is small, but it is updated frequently like a continuous health report.
Why – Why is telemetry crucial for safe flying?
Without telemetry, you would be flying almost “blind” regarding the drone’s status:
Battery level tells you when it is time to come back safely, not after it is already too late.
GPS and mode information show whether the drone is in GPS hold, ATTI mode, or Return-to-Home.
Signal strength indicators help you avoid flying deeper into a weak coverage zone.
Telemetry is also what the flight controller and app rely on when making decisions for low-battery or lost-link actions – it provides the numbers that fail-safe rules use.
How – How is telemetry sent and displayed?
The flight controller and other onboard modules continuously generate status data. This data is packed into small telemetry frames and sent back through the same or a parallel radio link that shares the drone’s working band and antennas.
On the ground, the remote controller or app decodes those frames and updates on-screen indicators: battery icons, satellite counts, maps, distance and height readouts, signal bars, and warning messages. When the system detects that control frames are missing or signal quality stays too low, the fail-safe logic uses GNSS, barometer, and home-point data to decide whether to hover, Return-to-Home, or land.
Extra – Use telemetry like a “dashboard” and a fail-safe helper
You can think of telemetry as both a dashboard for the pilot and a data source for fail-safe rules:
Check battery, distance, and height regularly – this is what the drone also uses to decide when to trigger low-battery Return-to-Home or landing.
Watch GPS status and mode: if it suddenly leaves GPS mode, it may drift more and fail-safe RTH will also be less precise.
Keep an eye on signal bars; dropping bars mean the system is getting closer to its lost-link threshold.
Before takeoff, confirm that the home point is recorded correctly – this is the position that fail-safe RTH will use if the control link disappears.
Learn what your drone is set to do when the link is gone (hover, RTH, or land in place), and avoid flying behind tall buildings or far beyond visual line of sight so fail-safe has enough room to work safely.

COMMENTS