 Sign in
 Sign up

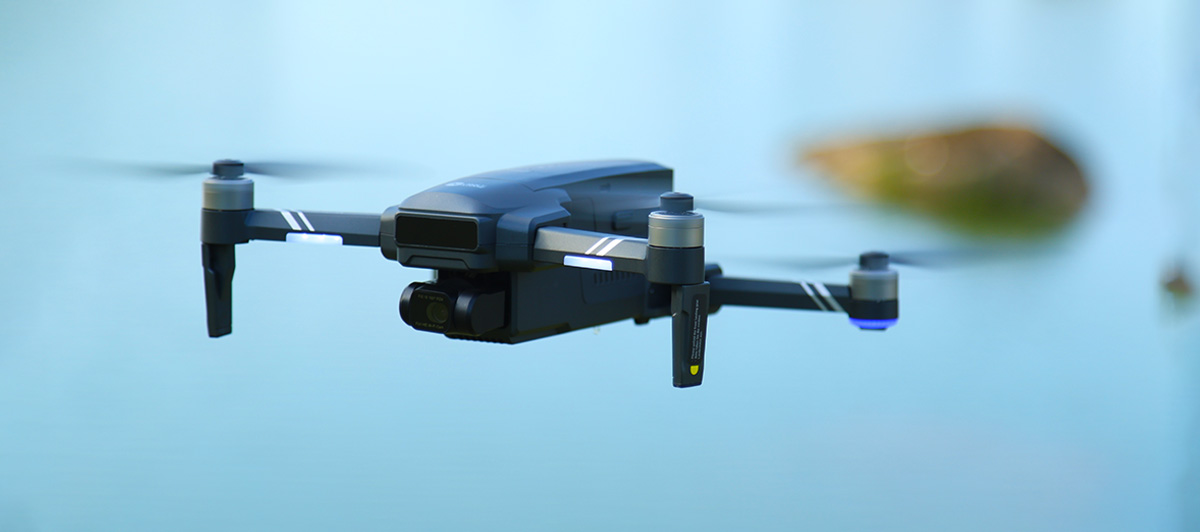
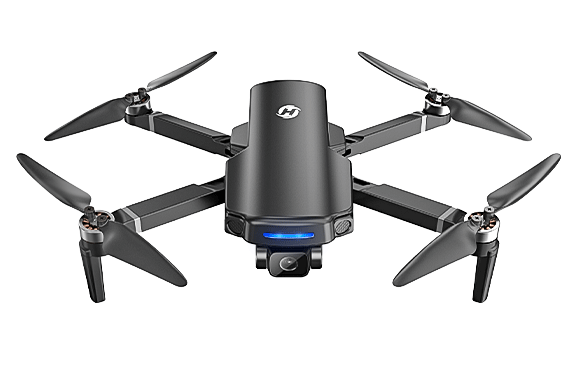
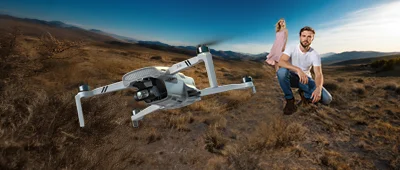
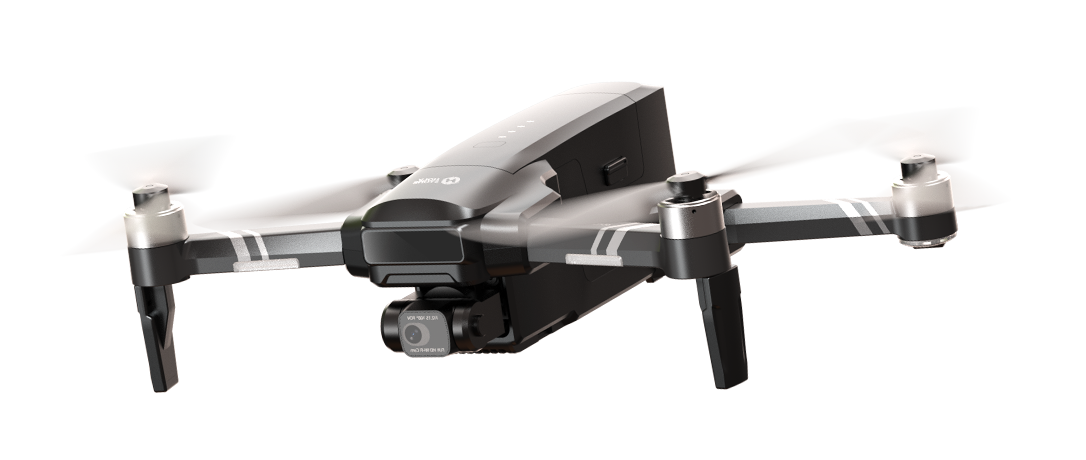
HS600:Tailored for Drone Enthusiasts
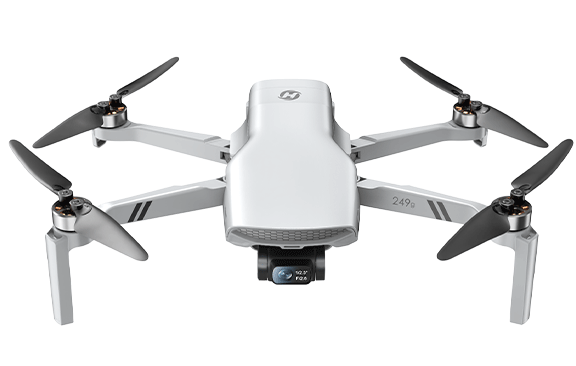
Model No.: HS600, Weight: 603g
Experience the freedom to soar with HS600 and enjoy smooth, steady flights & shots.


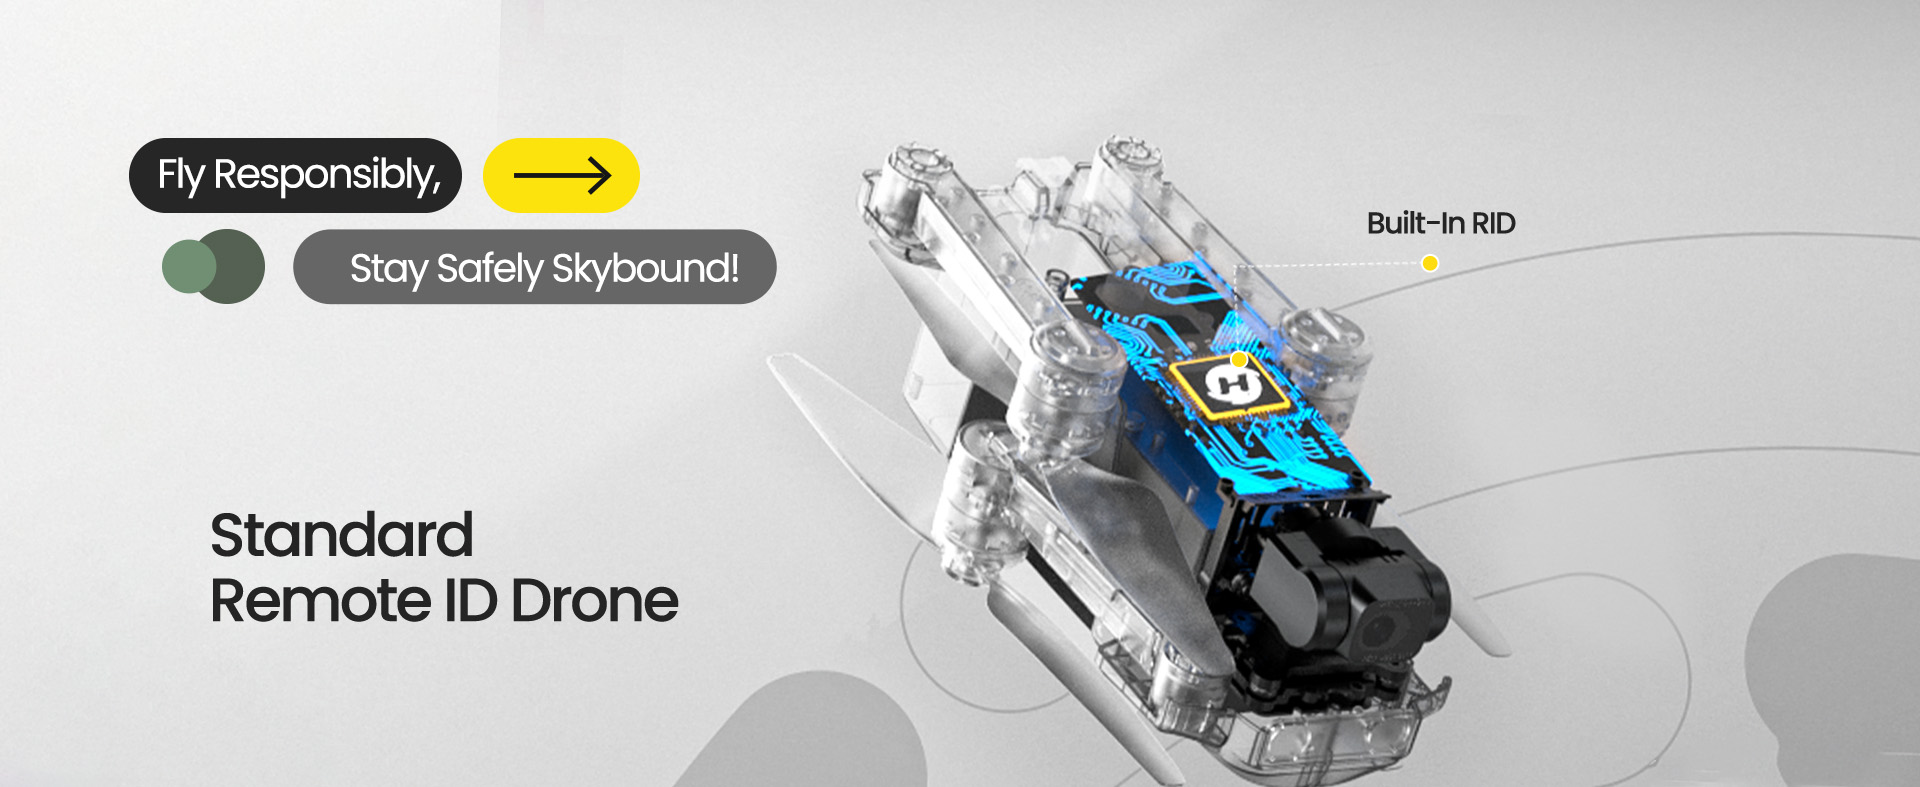
Built-in Remote ID – Ready to Fly Legally
The HS600 is FAA-compliant with a built-in Remote ID module – no additional accessories required.
Register for just $5 on the FAA site and enjoy legal, worry-free flights across the U.S., up to 10,000 ft.
Whether you're capturing landscapes, cityscapes, or outdoor adventures, you’re flying safe and within regulations.
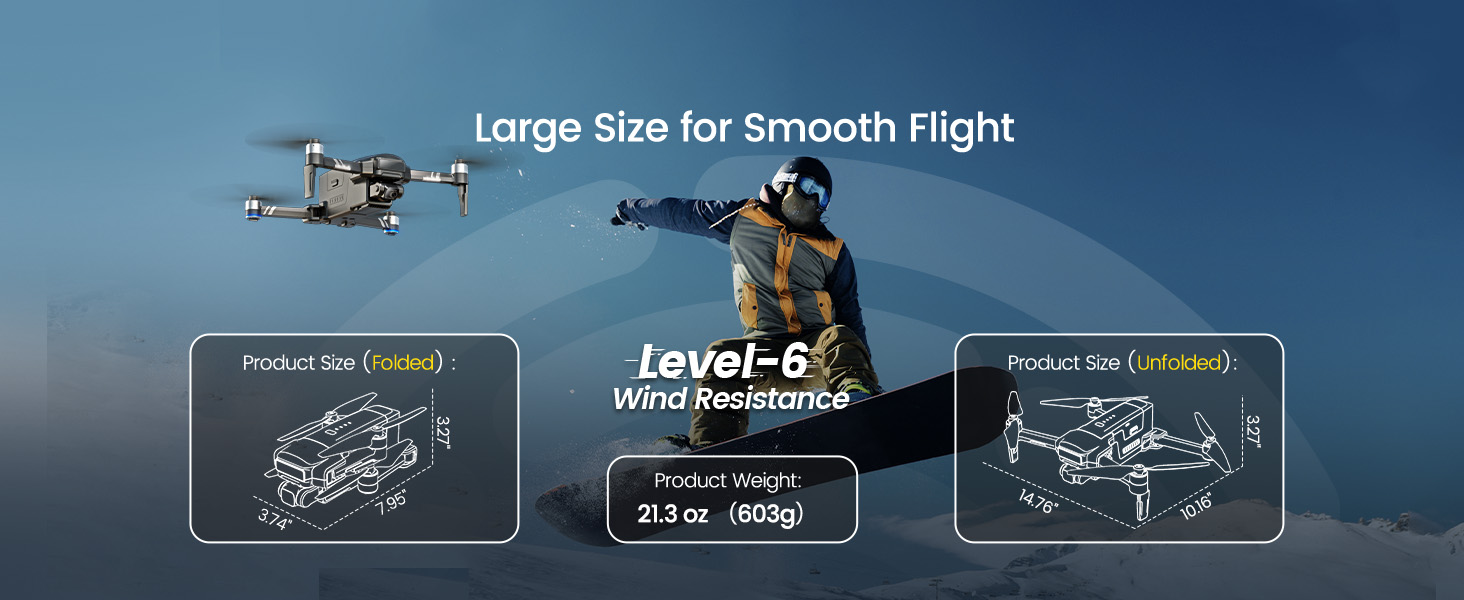
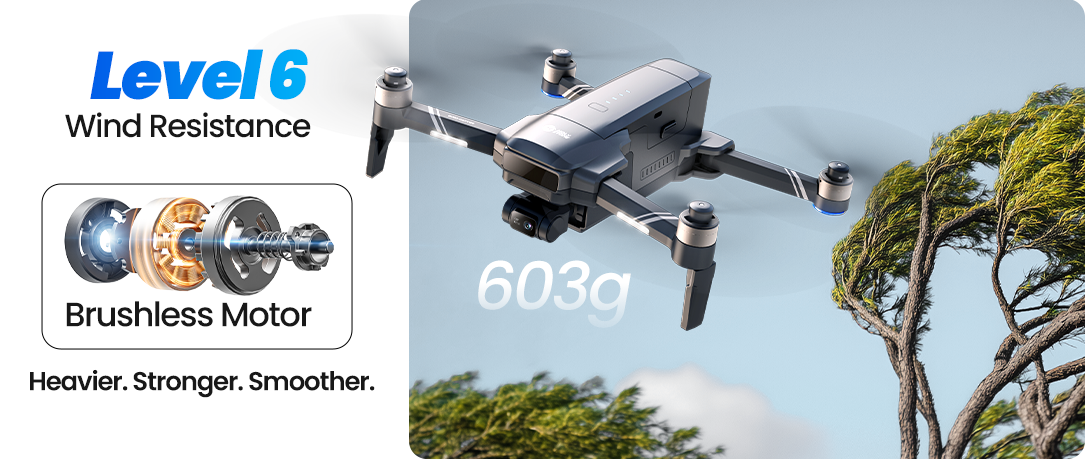
Level 6 Wind Resistance – Built for Outdoor Performance
Weighing 603g with a solid body and powerful brushless motors, the HS600 is engineered to withstand strong winds.
Even in breezy coastal areas or open fields, the drone holds its position and captures steady footage without compromise.
Fly confidently in challenging weather and maintain rock-solid stability in every frame.
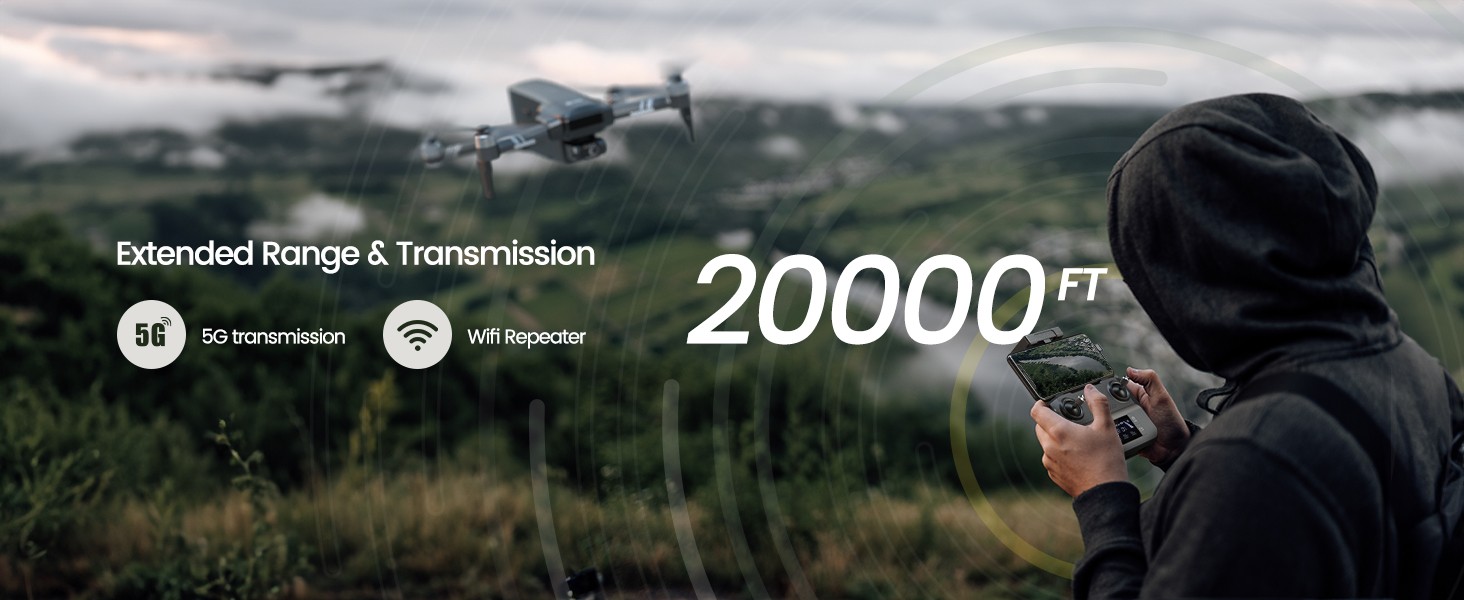
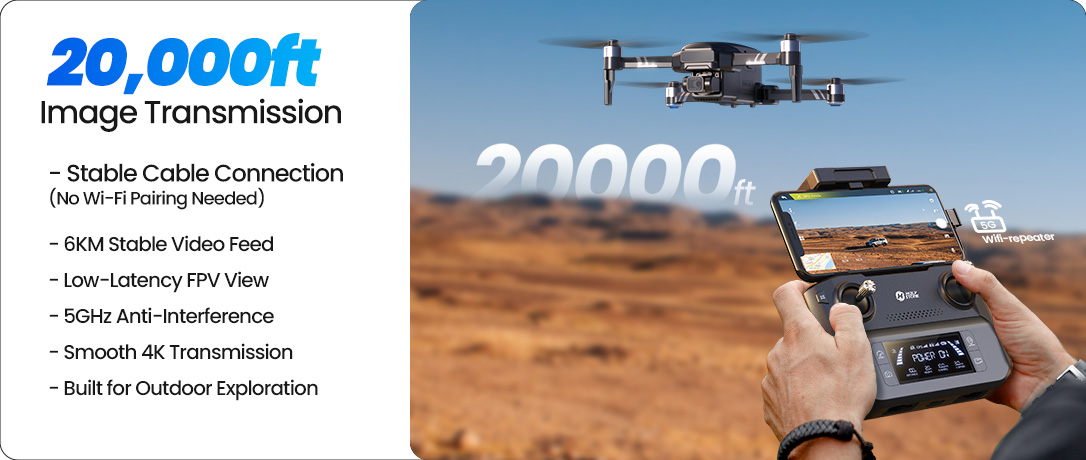
Extended Transmission Range – From 10,000 to 20,000 ft
HS600 doubles the standard range, reaching up to 20,000 ft (6 km) thanks to WiFi repeater relay technology.
Enjoy smooth, low-latency HD video feed and precise control, even when flying over wide rivers, forests, or valleys.
This upgraded range ensures creative freedom wherever your adventure leads.
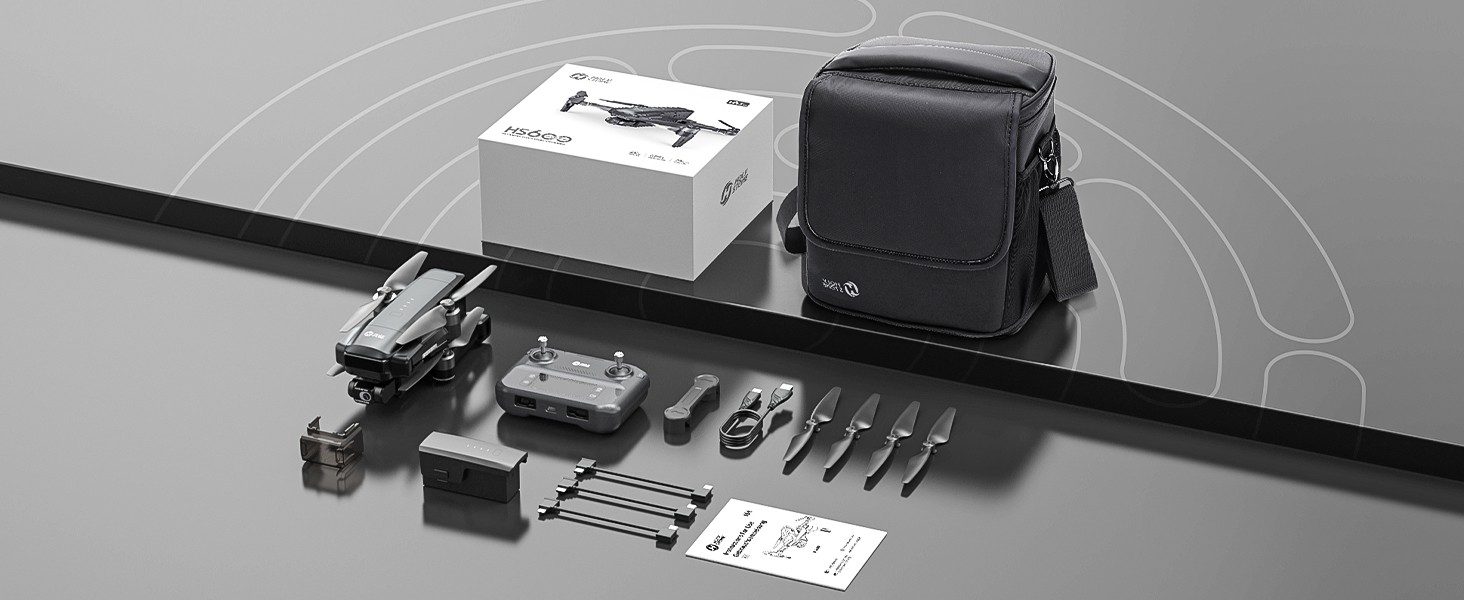
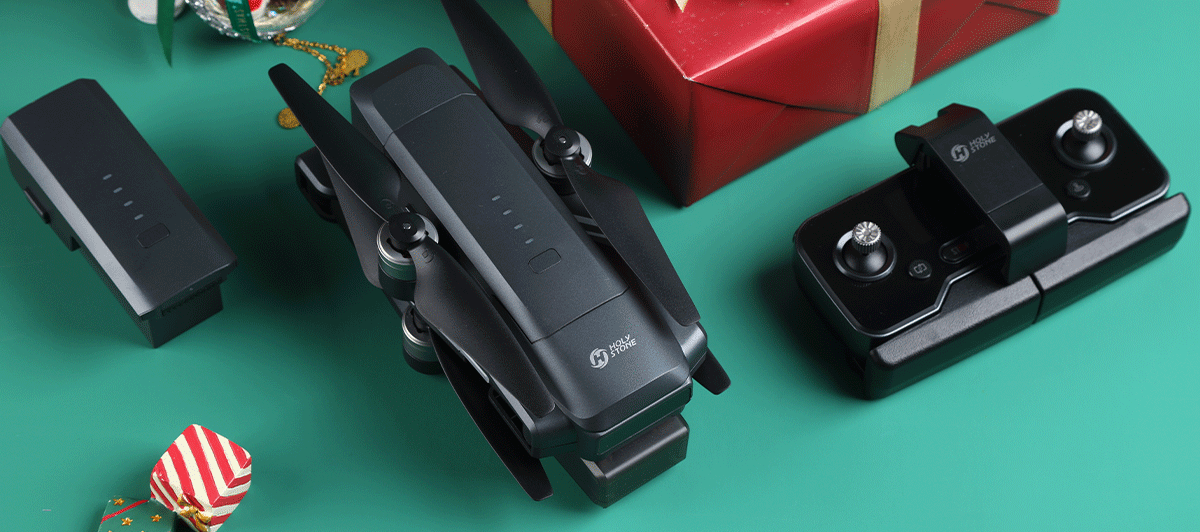
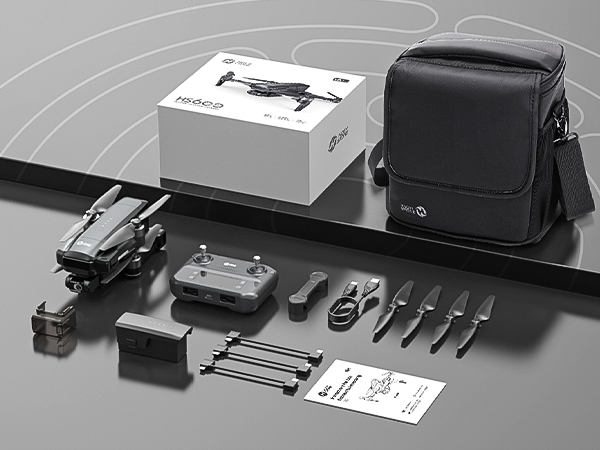
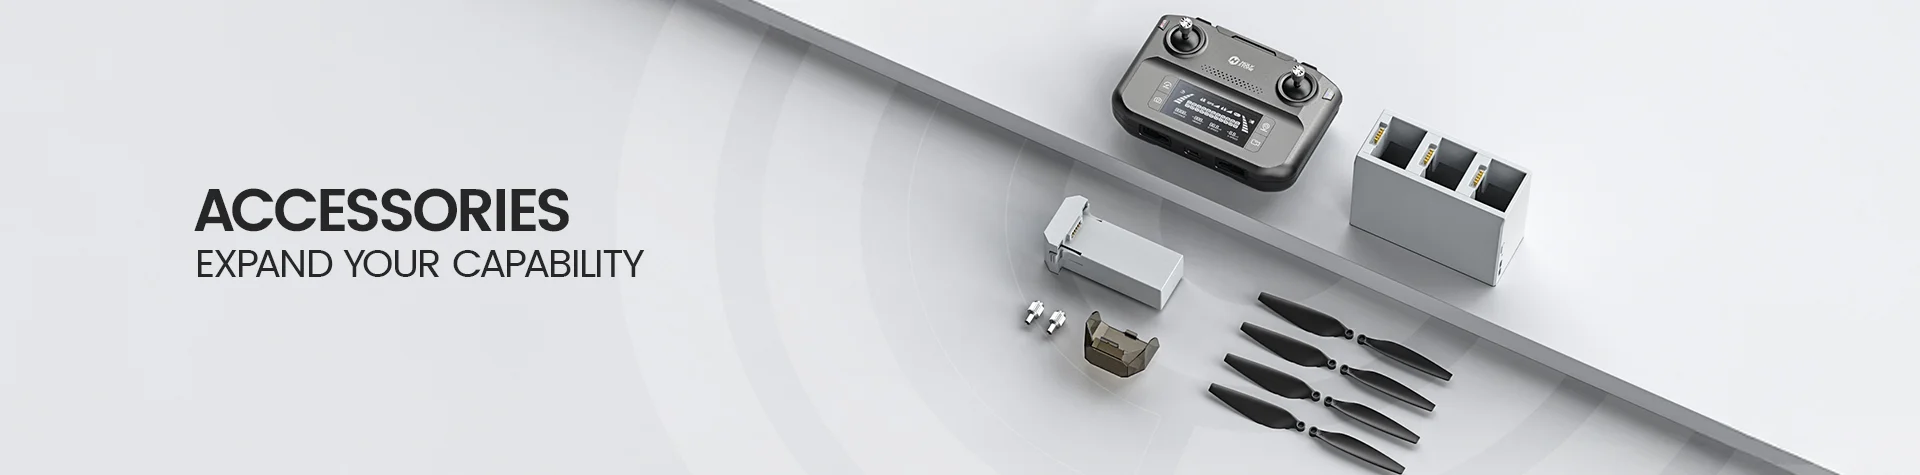
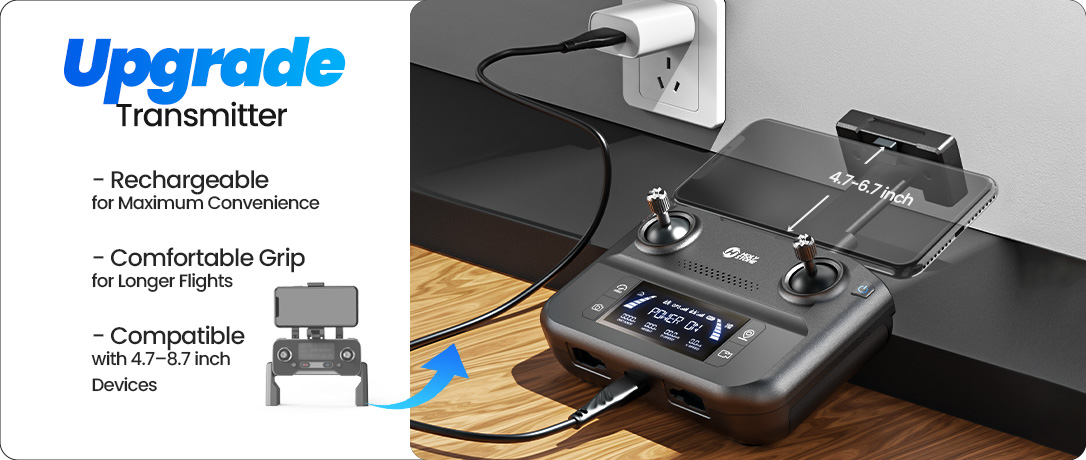
Everything You Need – Complete Package Included
The HS600 package includes all essential gear: drone, remote controller, battery, spare propellers, charging cable, and storage bag.
Perfect for beginners and experienced users alike—no need to purchase extra accessories separately.
Just unpack, charge up, and you’re ready to take off.
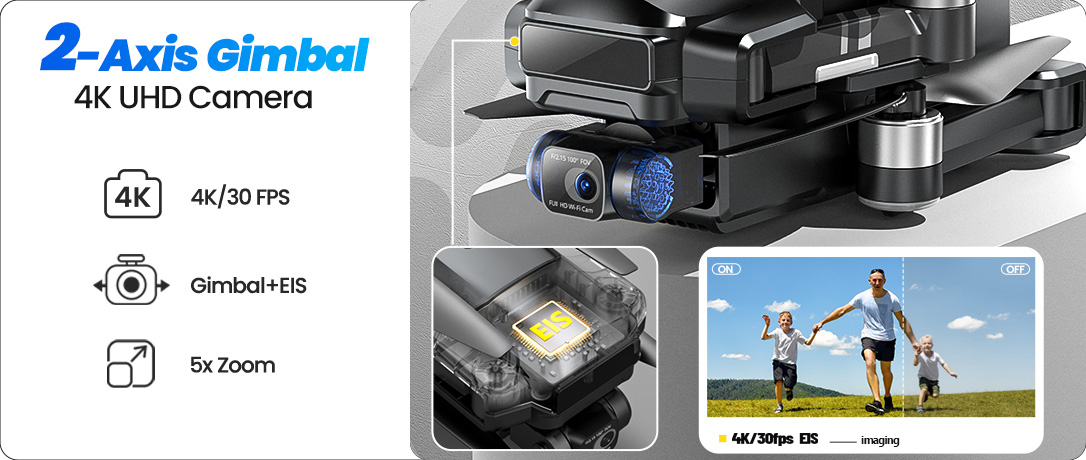
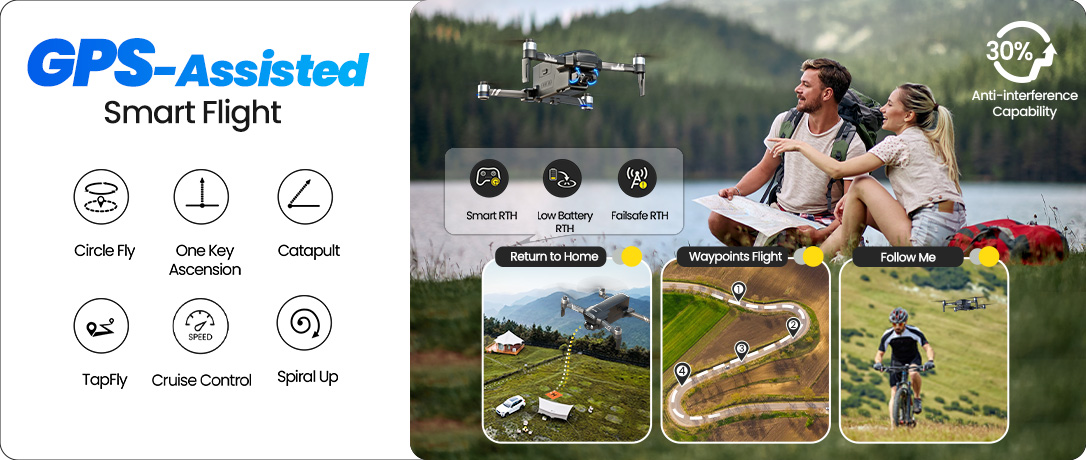
Masterful Shot Modes for Every Occasion
Point of Interest
Tap the ( Multi-functions ) icon first, select the ( Point of Interest ) icon, and follow the prompts to activate ( Set the circling radius in the prompt box ), the drone will record its current flight position as the "point of interest", then it will continuously circle that point clockwise. (default radius: 16 ft)
To exit, tap (Point of Interest) again.
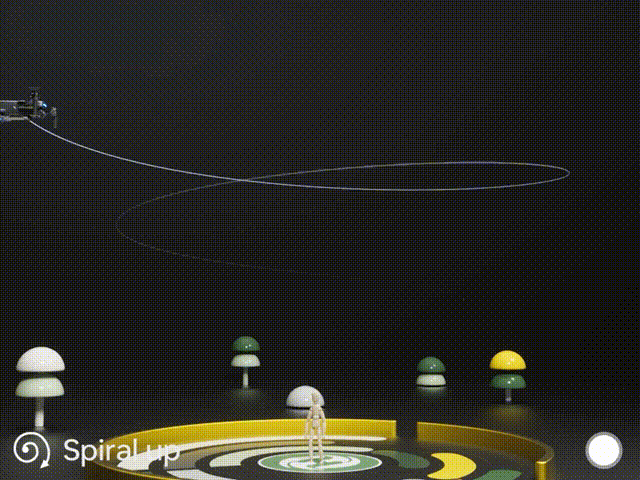
Spiral Up
Ensure the drone is about 16 ft from the target.
Adjust the camera angle towards the target. Tap (Multi-functions), then (Spiral Up). Swipe to confirm, and the drone ascends and circles (max. radius: about 49 ft), recording along the way. It will return to the starting point.
To exit, tap (Spiral Up) or push the right joystick.
Ensure no obstacles are in the flight path. In emergencies, push the right joystick to exit Spiral Up.

Tap Fly
When using Tap Fly, enlarge the map before drawing the flight path.
Tap the (Multi-functions) icon, then (Tap Fly). Tap on the phone screen up to 16 times to create a flight path. Hit "GO" to submit the route.
The drone will fly along the path created by connecting the tapped points.
Exit TapFly by tapping (Tap Fly) again or pushing the right joystick in any direction.
Avoid flying towards people, animals, or small/thin objects (e.g., tree branches and power lines) or transparent objects (e.g., glass or water).
Note: The actual flight path and the path you draw may not align perfectly.
Gesture Selfie
Tap the (Multi-functions) icon, then tap (Gesture Selfie) icon to enter the Gesture Selfie Mode.
Gesture Selfie: Trigger the drone camera shutter by holding a 'V' sign near your face.
Gesture Selfie Video: Trigger the drone camera shutter in this mode by holding your palm near your face.
Ensuring the drone camera points towards you.
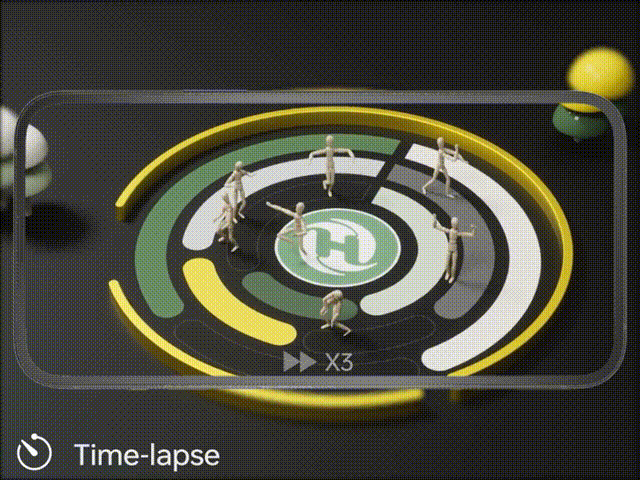
Time-lapse
Tap the Shooting Mode Icon, then tap the Time-lapse icon for time-lapse shooting. Swipe to select playback speed and tap to confirm.
Tap the shutter icon to start the time-lapse recording.
Tap the shutter icon again to stop recording.
One-key Ascension (bird's eye) & Catapult
Ensure the drone is at least 7 ft away from the target. Adjust the camera angle to point directly at the target.
Tap (Multi-functions), then (One-key Ascension). Swipe in the prompt box to confirm. The drone will start recording and ascend to 49 ft. Afterwards, it will fly back to the starting point.
To Exit: Tap (One-key Ascension) again or push the right joystick.
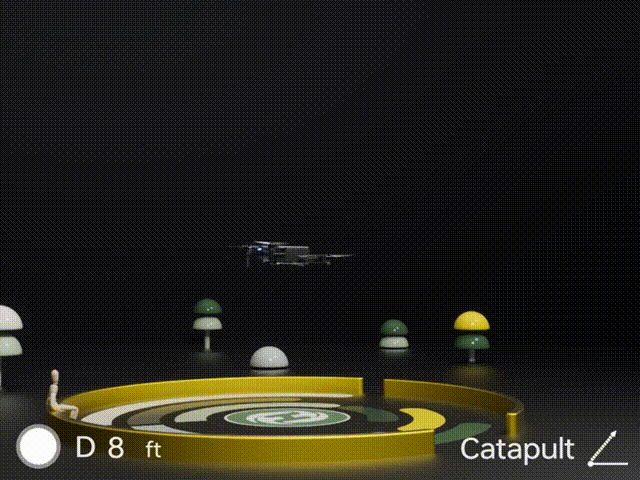
Catapult
Ensure the drone is at least 7 ft away from the target. Adjust the camera angle to point directly at the target.
Tap the (Multi-functions) icon, then the (Catapult) icon. Swipe in the prompt box to confirm. The drone will automatically start recording and fly about 82 ft away from the target. Afterwards, it will return to the starting point.
To Exit: Tap the (Catapult) icon again or push the right joystick to exit this function.
HS600 Real Shots