


 Sign in
 Sign up

Imaging System – Drone Systems Explained 2
Imaging System (Camera & Video System)
The drone’s Imaging System is the part that decides what you actually see in your photos and videos. It is made up of the camera sensor, lens and field of view (FOV), image stabilization system (EIS or gimbal), image processor (ISP), video resolution and frame rate settings, and the FPV live video transmission link.


The drone’s electronic eye
How wide the camera can see
EIS / Gimbal stability
The image brain
Clarity & smoothness
Part 1Camera Sensor ↑ Back
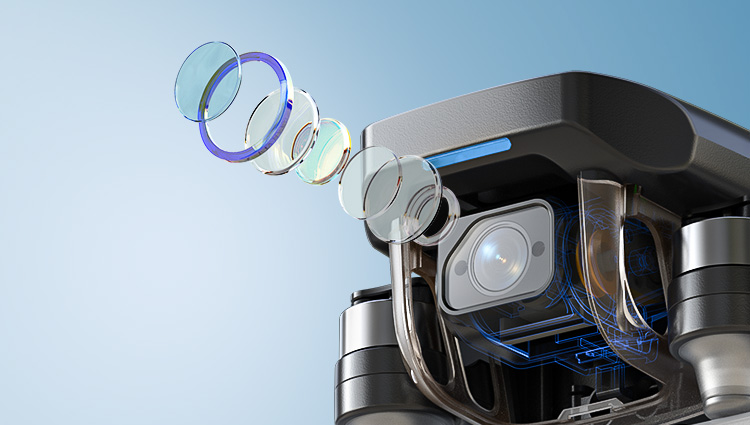
What – What is the Camera Sensor?
Camera Sensor = The drone’s electronic eye
The camera sensor is the heart of the imaging system. It is a small electronic chip (usually a CMOS sensor) that turns incoming light into electrical signals and then into digital image data. Its size, design, and quality largely determine how clear, clean, and detailed your photos and videos will be.
In practice, when people talk about “how good the sensor is”, they are usually talking about five core, easy-to-understand aspects:
1. CMOS technology – the manufacturing process of the sensor. Modern CMOS sensors are more sensitive, use less power, and read out image data faster, which helps with low light and high-frame-rate video.
2. Pixel count (megapixels) – how many tiny light-sensing cells (pixels) the sensor has, for example 12MP, 20MP, or 48MP. More pixels allow higher resolution images, but only work well when combined with a good sensor size and design.
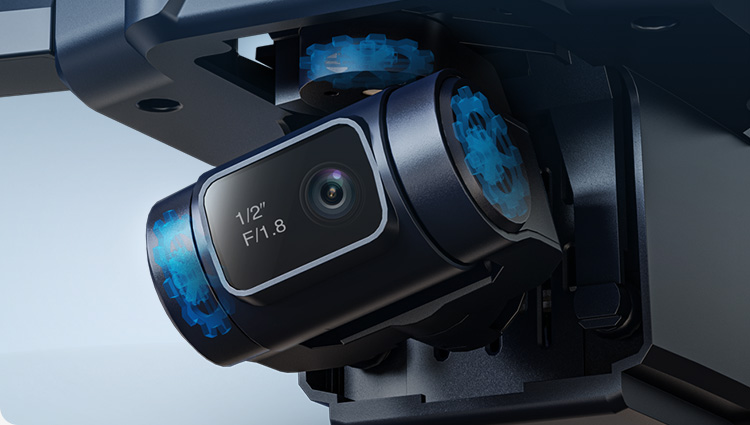
3. Sensor size – the physical area of the sensor, often written as 1/2.3", 1/2", 1", etc. A larger sensor can collect more light per frame, which improves detail, dynamic range, and low-light performance.
4. Pixel / circuit design – how each pixel and the surrounding circuitry are laid out on the chip (for example front-illuminated vs back-illuminated, stacked structure, etc.). Better designs allow each pixel to “catch” more light and reduce noise and artifacts.
5. Output capability – what the sensor + image pipeline can actually deliver: maximum photo resolution, video formats (such as 4K / 2.7K / 1080p), supported frame rates, and how clean and natural the final image looks.
Together, these five factors decide how much light the sensor can capture and how good the final image quality can be, far beyond just a single “MP” number on the spec sheet.
Why – Why experienced pilots care more about the sensor than the “megapixel number”
In the aerial photography community, any pilot with a bit of experience knows that the “4K” and “48MP” numbers in ads are only surface specs. The real limit of image quality is set by the sensor size, pixel structure, and underlying light-gathering ability, not by the megapixel label alone.
A larger sensor collects more light. This means cleaner shadows, better detail, and wider dynamic range, especially in complex lighting.
Cramming too many pixels into a very small sensor (common on 1/5'' or 1/6'' “toy-grade” sensors) makes each pixel extremely tiny. Low-light noise goes up, fine detail gets smeared, and night scenes often look worse, not better.
This is why two drones that both say “4K” on the box can sit in completely different image-quality leagues once you actually fly and compare the footage.
In the $50–$120 price band, it is almost impossible to find a true native 4K sensor. Around 90% of the “high-resolution” claims are really a mix of software upscaling, ultra-small CMOS sensors, and heavy algorithmic sharpening. The image is largely “built” by software instead of captured by strong hardware.
At higher price levels, sensor size and pixel design usually become more reasonable. Only then do you start to see cameras that can genuinely deliver the 4K performance their spec sheet promises.
For experienced pilots, a well-tuned 12MP or 20MP sensor with a decent-sized “bottom” is often far more valuable than a hyped “48MP” sensor that relies on pixel stuffing and interpolation.
In short, megapixels are just the result number. The sensor is the physical foundation that decides whether your drone can actually capture beautiful, clean footage in the real world.
How – How does the camera sensor work inside a drone?
During flight, light from the scene passes through the lens and falls onto the camera sensor. Each tiny pixel on the sensor measures how much light it receives and converts this into an electrical signal. The image processor then reads this data line by line to build a full-resolution image or video frame.
This process repeats many times per second. For example, when recording 4K 30fps, the sensor is creating and sending 30 full 4K frames every second to the image processor.
Extra – Common myths about drone camera sensors
Myth 1: “More megapixels always means better image quality.” Reality: On small drone sensors, overly high pixel counts can reduce sensitivity and increase noise.
Myth 2: “Two drones with 4K sensors must have similar image quality.” Reality: Sensor size, pixel design, and image processing make a huge difference between brands and models.
Myth 3: “Daylight shots look fine, so the sensor must be great.” Reality: A strong sensor really proves itself in high-contrast scenes (bright sky + dark trees) and at sunset or night.
Part 2Lens & Field of View (FOV) ↑ Back
What – What is Field of View (FOV)?
FOV = How wide the drone camera can see
Field of View (FOV) describes how wide the camera can see and is measured in degrees. A larger FOV means the camera captures more of the scene in a single frame; a smaller FOV shows a tighter, more focused view.
FOV directly affects image width, distortion, perspective, and immersion. It is one of the key lens parameters that define the “style” of your footage.
In the drone world, it is important to separate two very different design goals:
Aerial camera drones – aim for natural, low-distortion footage for travel, landscape, and city shots. Most consumer aerial drones use a moderate FOV, typically in the ≈80°–90° range.
FPV / racing drones – use much wider, more distorted FOV, often above 120°, to maximise immersion, speed feeling, and awareness of obstacles during high-speed flying.
The same word “FOV” can therefore describe very different experiences, depending on whether the drone is built for cinematic aerial imaging or FPV-style flying.
Why – Why does FOV matter when choosing a drone?
FOV directly defines how your footage feels: whether it looks natural and comfortable to watch, or extreme and immersive like an action camera or FPV feed.
Standard aerial FOV (≈80°–90°) – this is the “sweet spot” for everyday aerial footage. It looks close to human vision, keeps buildings straight and horizons level, and gives a wide but not exaggerated perspective. Many mainstream camera drones fall roughly in the 82°–86° range.
Narrower aerial FOV (≈72°–80°) – used on some higher-end, cinema-oriented lenses. It reduces distortion even further, strengthens subject separation, and creates a more “compressed”, film-like perspective that works very well for architecture and storytelling shots.
Ultra-wide FPV FOV (≈145°–170°) – common on freestyle and racing FPV drones. It shows a huge amount of the surroundings and strongly enhances speed and immersion, but with clearly visible “fisheye” curvature at the edges.
Wide FPV / action FOV (≈120°–140°) – often used on cine-FPV setups to balance immersion and control. Distortion is still present but can be managed more easily in post-processing.
This is why experienced pilots always look at FOV and real sample footage, not just resolution or megapixel numbers. The same “4K” with different FOV can feel like a cinematic movie, a natural travel vlog, or a wild FPV ride.
How – Typical FOV choices for aerial drones and FPV drones
Aerial camera drones (cinematic / travel use)
Most consumer aerial drones use an effective FOV around 80°–90°. This range gives a wide, immersive view while keeping distortion low enough for natural-looking landscapes and city shots.
Some premium aerial cameras use a slightly narrower FOV (around the 70°–78° range). This gives straighter lines, stronger subject separation and a more controlled, cinematic perspective compared with the typical 80°–86° aerial FOV.
FPV / racing drones (immersion and speed)
Freestyle / racing FPV drones commonly run ≈145°–170° FOV. This ultra-wide view maximises peripheral vision and safety when flying fast and close to obstacles, at the cost of strong fisheye distortion.
Cine-FPV builds often choose lenses or modes in the ≈120°–140° FOV range to keep the immersive feel while making distortion easier to control or correct in post.
Because the design goals are so different, a “good” FOV for an FPV drone is usually far too wide and distorted for a classic aerial camera drone, and vice versa.
Extra – Practical FOV tips when comparing drone cameras
If you mainly want cinematic travel footage – choose an aerial camera drone with FOV around 80°–90°. This range is wide enough for landscapes but keeps distortion low, which makes long videos more comfortable to watch.
If you prefer straighter lines and a more “cinema” look – consider models using a slightly narrower FOV (around the 70°–80° band). You may need to fly a bit farther back to fit everything in the frame, but buildings and horizons will look very clean.
If a non-FPV camera drone claims very wide FOV (for example, over ≈100° and closer to action-cam numbers), be cautious. It may rely heavily on software distortion correction or produce stretched edges that feel more like an action camera than classic aerial photography.
For FPV-style flying, very wide FOV (often ≥145°) is normal and actually helpful. Just remember that such footage will naturally look more curved and “fish-eye” compared to standard aerial shots.
Always check sample videos. FOV is not a “bigger is better” parameter – it is about whether the perspective matches the style of footage you actually want to create.
In summary, resolution and sensor quality decide how sharp and clean your image is, but FOV decides whether it feels like a natural aerial scene, a cinematic frame, or an FPV ride.
Part 3Image Stabilization (EIS / Gimbal) ↑ Back
What – What is Image Stabilization?
Stabilization = Keeping your footage steady, level, and watchable
Image stabilization refers to the technologies that keep your drone footage smooth and stable, even when the drone is affected by wind, vibration, acceleration, or sudden stick movements.
In consumer drones, stabilization mainly comes in two forms:
EIS (Electronic Image Stabilization) – an algorithm-based method that corrects shake by analysing each frame and compensating through cropping and remapping.
Three-axis mechanical gimbal – a hardware system with motors that physically keep the camera level and isolated from drone movement.
Both aim to produce smooth video, but their performance, cost, and target users are very different. Understanding how each type works is key to choosing the right drone.
Why – Why does stabilization matter?
No matter how good the sensor or how high the resolution is, unstable footage is difficult to watch. A drone in flight constantly experiences:
Wind and air turbulence
Motor vibration and micro-oscillation
Sudden braking, acceleration, and turning
Rolling shutter distortion (“jello” effect)
Without stabilization, the footage will shake, tilt, wobble, and distort. This is why experienced pilots often say:
“Stability matters more than resolution.”
Stabilization is the foundation that determines whether your 4K sensor can actually produce footage that looks smooth and cinematic.
How – EIS vs Gimbal: which one should you choose?
EIS (Electronic Image Stabilization)
How it works: The camera captures a slightly larger image and uses algorithms to track motion, then digitally compensates for shake through cropping and frame-to-frame warping.
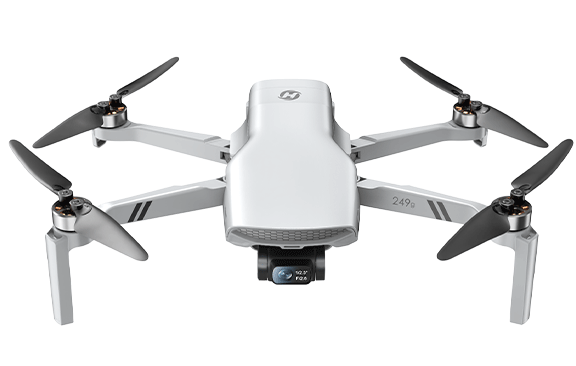
Strengths: lightweight, durable, budget-friendly, ideal for beginner drones and sub-249g designs. Models like the HS720E (Big Promotion Now!) HS175G and HS360E use true high-grade EIS.
Limitations: small loss of field of view due to cropping, less effective in strong wind or heavy motion, cannot perfectly maintain horizon level, reduced performance in low light.


Three-axis mechanical gimbal
How it works: Three brushless motors actively stabilise the camera in pitch, roll, and yaw, physically cancelling out drone movement.
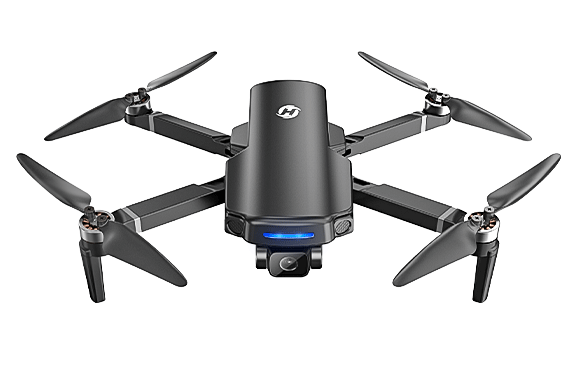
Strengths: best possible stability, straight horizons, no cropping, excellent low-light performance, ideal for cinematic footage. Available on models like the HS900, HS790, and HS600.
Limitations: higher cost, more complex hardware, slightly heavier, and more vulnerable to impact.
In practical terms:
EIS = smoother footage for lightweight and beginner drones
Gimbal = true cinematic stability for creators and travelers


If your goal is casual flying or travel snapshots, EIS drones like HS175G and HS360E offer excellent value. If you want publish-ready video, clean horizons, and stable low-light footage, a gimbal drone such as HS900, HS790, or HS600 is the better choice.
Extra – Why do true EIS drones often cost over $200?
Many low-priced drones claim to offer EIS, but their effect is often minimal. High-quality, real-time EIS requires a series of hardware and software upgrades that significantly increase cost:
More powerful ISP / SoC – real EIS requires intensive motion estimation, warping, and rolling-shutter compensation, which entry-level processors cannot handle.
Higher-speed image sensors – fast readout reduces jello effect; these sensors cost more than basic 4K chips.
Higher bandwidth and encoding performance – true 4K EIS demands stronger transmission hardware and higher-bitrate video encoding.
Advanced algorithm tuning – optical flow, lens distortion models, motion curves, and stabilization matrices require extensive engineering and calibration.
This is why drones that deliver noticeably stronger, more reliable EIS — such as the HS175G and HS360E — naturally sit in the $200+ performance bracket, while cinematic users may choose to step up to gimbal drones like the HS900, HS790, or HS600.
In short, stabilization determines whether your footage is simply “usable” or truly “beautiful”, and choosing the right type will dramatically shape your aerial video experience.
Part 4Image Processor (ISP) ↑ Back
What – What is the Image Signal Processor (ISP)?
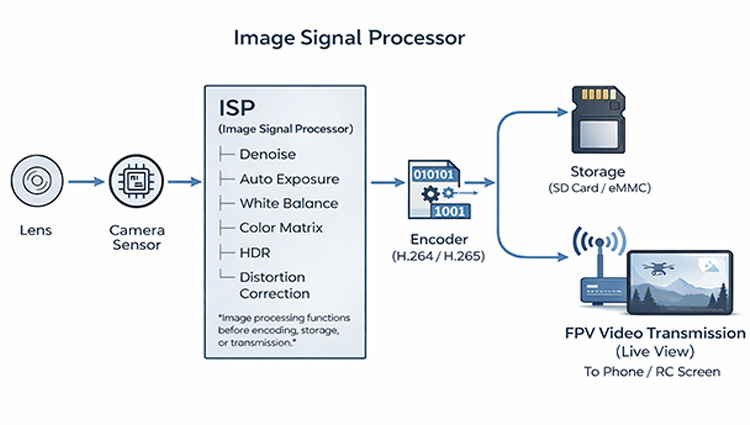
ISP = The “image brain” that turns raw sensor data into a finished image
The Image Signal Processor (ISP) is the processor that interprets the data coming from the camera sensor and transforms it into the final photo or video you see. It controls how the drone handles color, brightness, noise, dynamic range, detail sharpness, and even stabilization performance.
Although drone spec sheets rarely mention ISP details, it is one of the most important components of the entire imaging pipeline. Two drones with the same “4K sensor” can deliver completely different image quality because of the strength of their ISP.
Why – Why does ISP matter for drone image quality?
The ISP determines how well the camera can handle real-world challenges. It directly affects five major aspects of image quality that consumers can clearly see:
1. True detail and sharpness – A strong ISP preserves fine textures and edges instead of producing the “soft 4K” or “watercolor effect” common in budget drones.
2. Noise handling and night performance – ISP controls noise reduction, exposure, and tone mapping. A weak ISP creates noisy, smeared low-light footage; a strong ISP keeps the image clean with natural detail.
3. Color accuracy and style – ISP defines the “look” of the footage. Colors may appear natural, cinematic, punchy, or sometimes tinted if the ISP is not well tuned.
4. Dynamic range and highlight recovery – A good ISP prevents blown-out skies and crushed shadows, especially when shooting against bright sun or reflective surfaces.
5. Stabilization performance – EIS relies on ISP processing power. Strong ISPs enable high-quality EIS; weak processors cause rolling-shutter wobble, latency, or ineffective stabilization.
This is why two drones with identical resolutions can look dramatically different in real-world footage. The ISP determines whether “4K” actually looks like 4K.
How – How ISP shapes what you see in real footage
Key ISP tasks that influence drone video quality
Denoising and sharpening – finding the right balance between preserving detail and smoothing noise.
Color processing – tuning white balance, contrast, saturation, and tonal response to create a consistent “look”.
HDR and exposure control – merging tonal information to handle bright skies and dark ground simultaneously.
Motion analysis for EIS – enabling stabilization algorithms to track motion correctly and avoid jello artifacts.
Lens correction – compensating for distortion or chromatic aberration, especially in wide-angle lenses.
In practice, these processes work together to give each drone its unique “image personality.” A drone with a strong ISP will produce cleaner, more cinematic footage even with the same hardware as a cheaper model.
Part 5Resolution & Frame Rate ↑ Back
What – What are Resolution and Frame Rate?
In the previous section, we introduced Megapixels (MP) — the amount of raw information a camera sensor can capture. But megapixels alone do not decide how your final video looks. The actual visual quality on your screen is determined by two key output parameters: Resolution and Frame Rate (FPS).
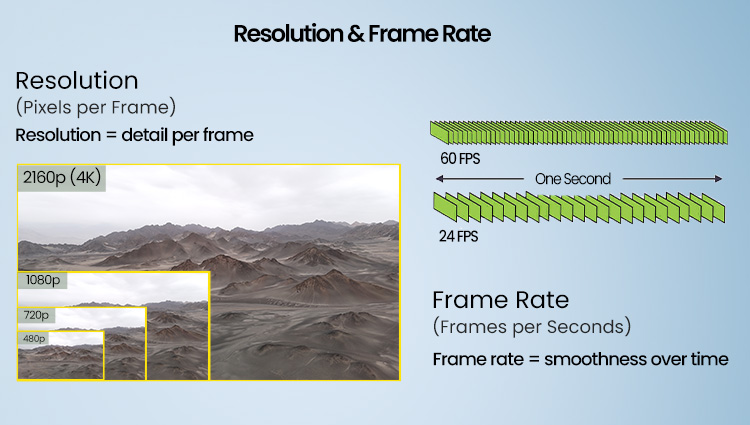
Resolution refers to how many pixels each frame contains, measured as Width × Height. Higher resolution means more spatial detail and a clearer image.
Frame Rate (FPS) refers to how many frames are displayed per second. Higher FPS gives smoother motion and reduces motion blur in fast scenes.
In short:
Megapixels = the camera’s potential
Resolution + Frame Rate = the real-world video performance
This is why a 48MP sensor does not automatically produce better video than a 12MP sensor. What truly matters is whether the drone can stably output high resolution (e.g., 4K) at a suitable frame rate (e.g., 30fps/60fps).
Most “8K” claims seen on shopping platforms are not true 8K video. They often use software upscaling, interpolation, or enlarged still frames instead of recording real 7680×4320 footage.
Don't Be Misled:
If a drone's official video specifications list 4K, 2.7K, or 1080P as the maximum video resolution, then it cannot shoot real 8K video — regardless of what the product title or banner advertises. Always check the “Video Resolution” section.
Reality Check:
True 8K recording requires extremely powerful processors, high-bandwidth storage, and professional-grade sensors. Only a few high-end drones, such as the DJI Inspire 3, can produce real 8K video. For most consumer drones, “8K” is marketing exaggeration rather than actual performance.
Why – Why do Resolution and Frame Rate matter when choosing a drone?
Resolution determines how clear your footage looks, while frame rate determines how smooth it feels. Both strongly affect the viewing experience, especially for travel, cinematic, or action-style shots.
Resolution presets (how clear each frame is)
1080P (1920×1080) – good for beginners; small files; enough for casual flying.
2.7K (2720×1530) – the “sweet spot”; noticeably sharper than 1080P; easier to process than 4K.
4K (3840×2160) – best for travel and landscape shots; excellent detail and cropping flexibility.
Frame rate presets (how smooth the motion feels)
24fps – cinematic motion; ideal for storytelling.
30fps – natural and stable; suitable for most aerial shots.
60fps – very smooth; perfect for fast movement, chasing shots, or sports scenes.
Choosing the right combination ensures your footage looks both clear and pleasant to watch.
How – How to choose the right Resolution + FPS for your needs?
Recommended combinations for different use cases
Travel, landscapes, city shots – choose 4K 30fps.
Vlog, people, slow flying – choose 2.7K or 4K 30fps.
Chasing bikes, cars, action scenes – choose 1080P or 2.7K 60fps.
Beginners or casual flying – 1080P 30fps is sufficient.
Editing / cropping – choose 4K 30fps or 60fps.
While 4K 30fps offers technically higher resolution, 2.7K 30fps is often the more practical choice for most users, especially on today’s short-video platforms.
In Practice:
Social apps like TikTok, Instagram, YouTube Shorts, and Facebook heavily compress uploads. After compression, the visual difference between 4K and 2.7K becomes small, but 4K files remain much larger and slower to upload, transfer, and edit.
Tip:
For everyday creators, travelers, and social media users, 2.7K 30fps usually offers the best balance of clarity, file size, and editing performance — making it the real-world “sweet spot” for aerial video.
Typical file sizes (per ~1 minute of video)
| Resolution | 30fps | 60fps |
|---|---|---|
| 1080P | ~90MB | ~180MB |
| 2.7K | ~200–260MB | ~400–520MB |
| 4K | ~350–750MB | ~700MB–1.5GB |
A simple rule of thumb:
When shooting scenery — prioritize resolution.
When shooting motion — prioritize frame rate.
Extra – Practical tips for comparing Resolution and FPS across drones
Stability matters more than raw resolution — stable 4K 30fps beats shaky 4K 60fps.
60fps increases processing load — more CPU/GPU usage, more EIS workload, more battery drain, larger files.
Phone screens show limited difference — 1080P/2.7K/4K look similar on small screens; differences appear on PCs/TVs.
If “4K footage” looks soft — the drone may use low bitrate or heavy compression. Check sample footage.
60fps for action — lower resolution + higher FPS often looks better than high resolution + blur.
Storage matters — 4K files are large; 1080P is easier to save/share.
In summary, resolution defines clarity, and frame rate defines smoothness. Choose according to shooting needs, stabilization performance, and storage limits.

COMMENTS