- Drones
-
Accessories
- Holy Stone Remote ID ModuleHS600 Spare PartsHS720R Spare PartsHS360S Spare PartsHS720G Spare PartsHS720/ HS720E Spare PartsHS700E Spare PartsHS175D Spare PartsHS110G Spare PartsHS440 Spare PartsHS430 Spare PartsHS420 Spare PartsHS340 Spare PartsHS190 Spare PartsHS260 Spare PartsHS110D Spare PartsF181W Spare PartsMore Parts More

- Blog
- Support
- About


 Sign in
 Sign up
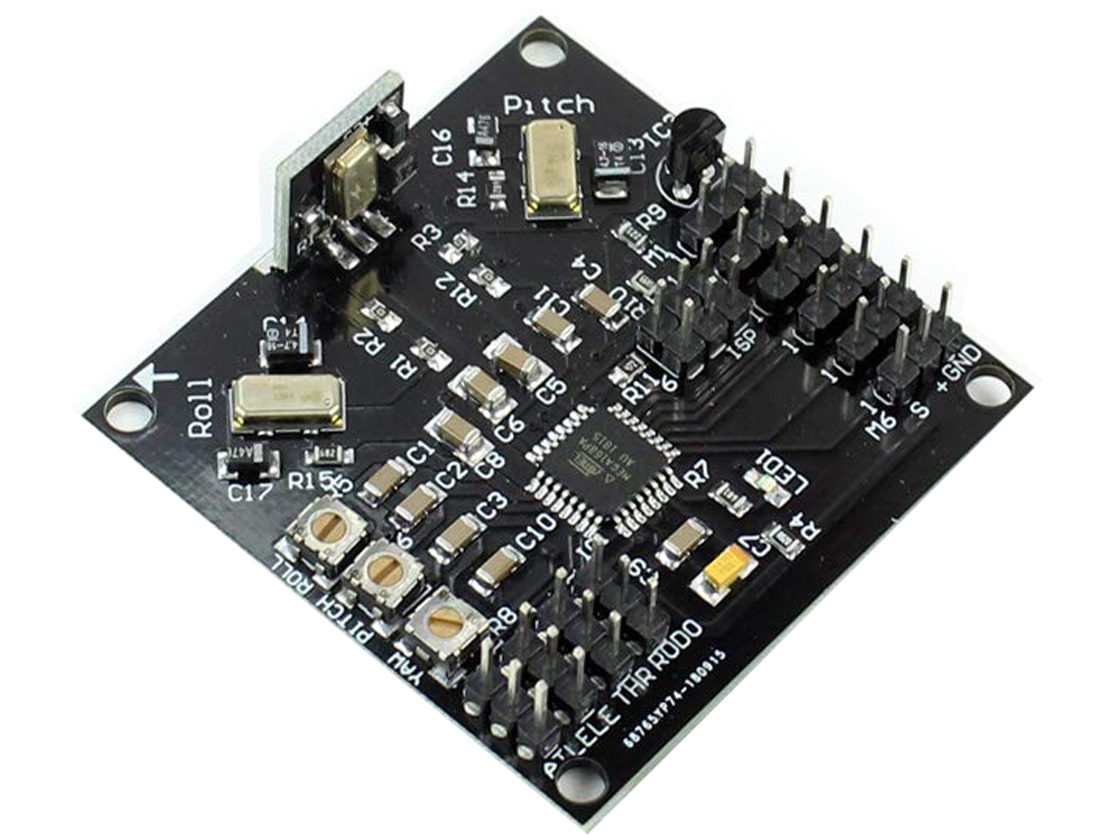
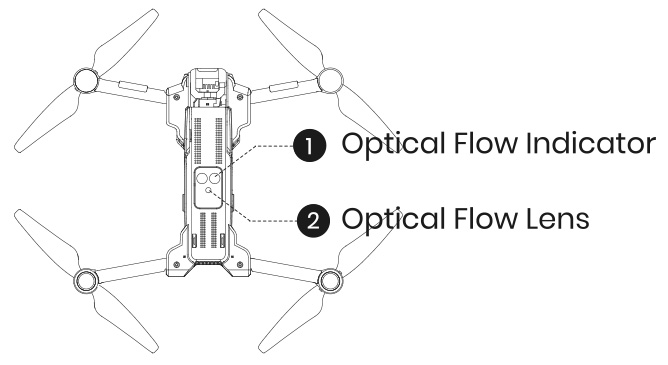
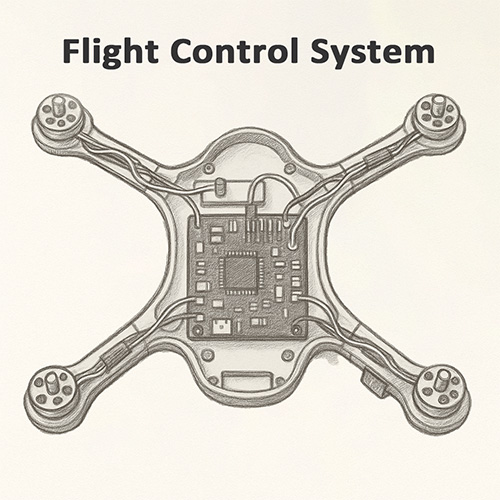 #FlightControlSystem
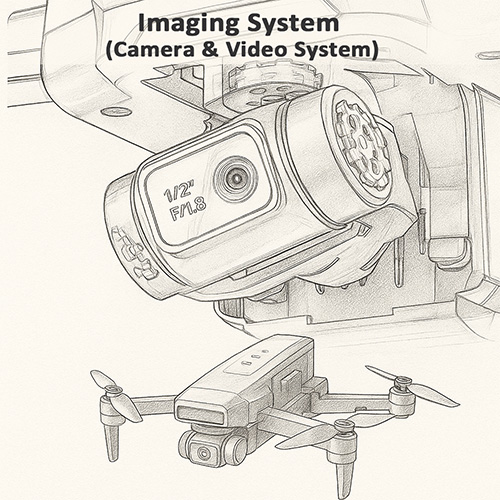 #ImagingSystem
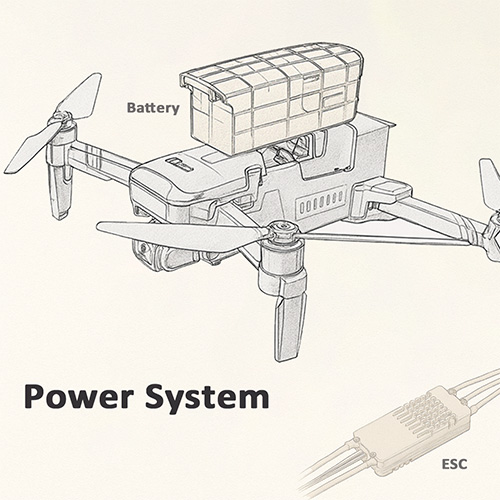 #PowerSystem
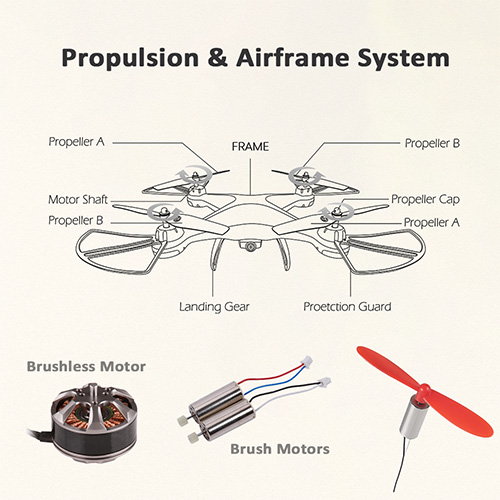 #PropulsionSystem
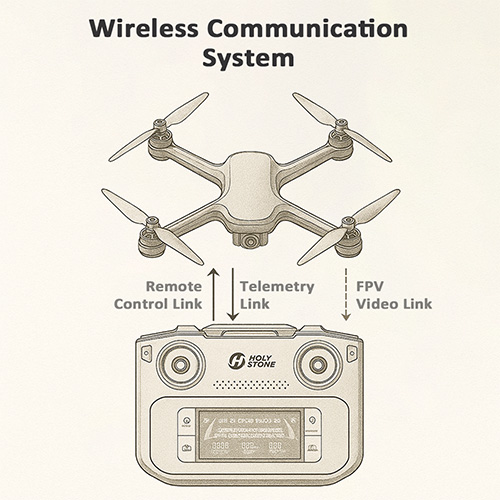 #WirelessCommunicationSystem
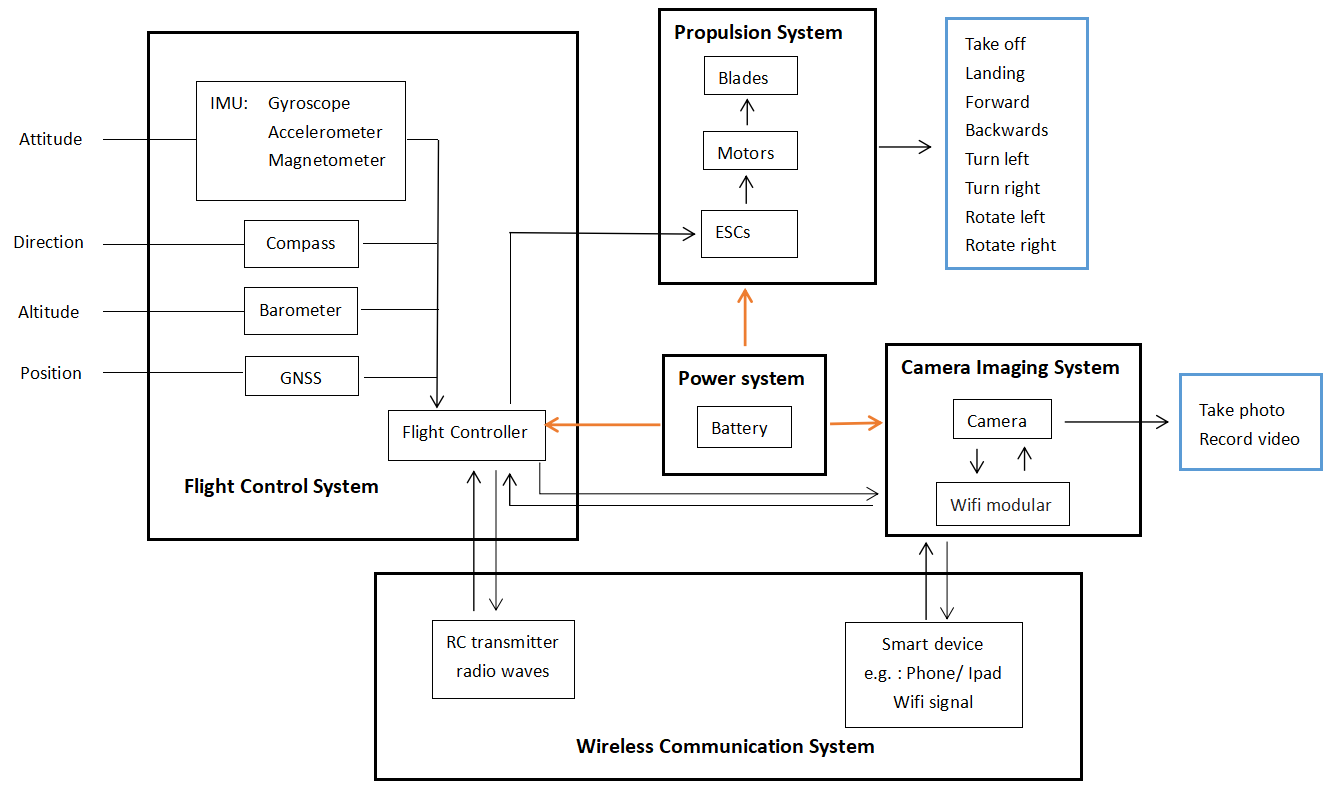

COMMENTS